
Heavy plate with a slab thickness of up to 400 mm or more is produced in nearly all unalloyed and alloyed steel grades today. The diverse range of properties, e.g., yield strengths from 200 to more than 1100 N/mm2 ensures the precise suitability for use in bridges, high rise buildings, offshore platforms, ship building, line pipes, pressure vessels, heavy-duty machines, and much more. In order to reduce the constructive thicknesses and, with it, the self-weight of a construction, higher-strength steel grades are increasingly requested, while the weldability and the cold toughness must still be acceptable.
For the production of such steel grades, modern manufacturing processes, such as water/air quenching and tempering, accelerated cooling, normalizing, and thermo-mechanical rolling are applied. The customer asks for geometrical and mechanical properties, which are uniform across product length and width, especially for these high-value grades. Consequently, high demands are made on the determination and documentation of product quality.
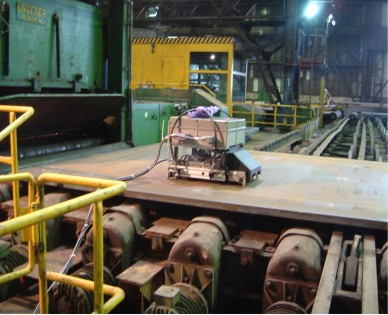
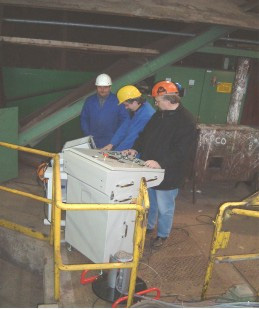
In first projects, a 3MA system was integrated into a trolley, allowing for 3MA tests to be performed on plates moving on the roller conveyor line in the steel plant. Figure below shows this device. A brushing device was integrated into the trolley in order to the remove scale that otherwise represents a strong disturbing influence.
|
|
Remote application of the 3MA system in the roller conveyor line of a steel plant: (a) 3MA inspection trolley and (b) remote control desk
Calibration was done on coupons that were taken from the running production. It was apparent that the best results could be achieved if individual calibration functions were used for each steel grade and each plate thickness. In this case, the RMSE was in the range of 4 HB (Brinell hardness) for hardness determination, 10 MPa for Rm, and 20 MPa for Rp0.2.The main objective of a second project was to avoid pseudo-scrap in heavy plate by the precise detection of the so-called cold ends in the mother plate after rolling. This is shown in Figure below. Cold ends are developing due to altered cooling conditions and at the plate ends. The cold ends are characterized by impaired mechanical properties (Rm and Rp0.2). Therefore, they have to be removed in order to assure a plate that fulfills the quality requirements over the entire length. For this purpose, large sections—usually much larger than the cold ends—are cut off. Due to these safety margins, pseudo-scrap is produced, i.e., material, which still fulfills the requirements on material conformity, is unnecessarily removed and scrapped. In order to avoid this pseudo-scrap, the extension of the cold ends has to be precisely detected. This can be accomplished by 3MA.
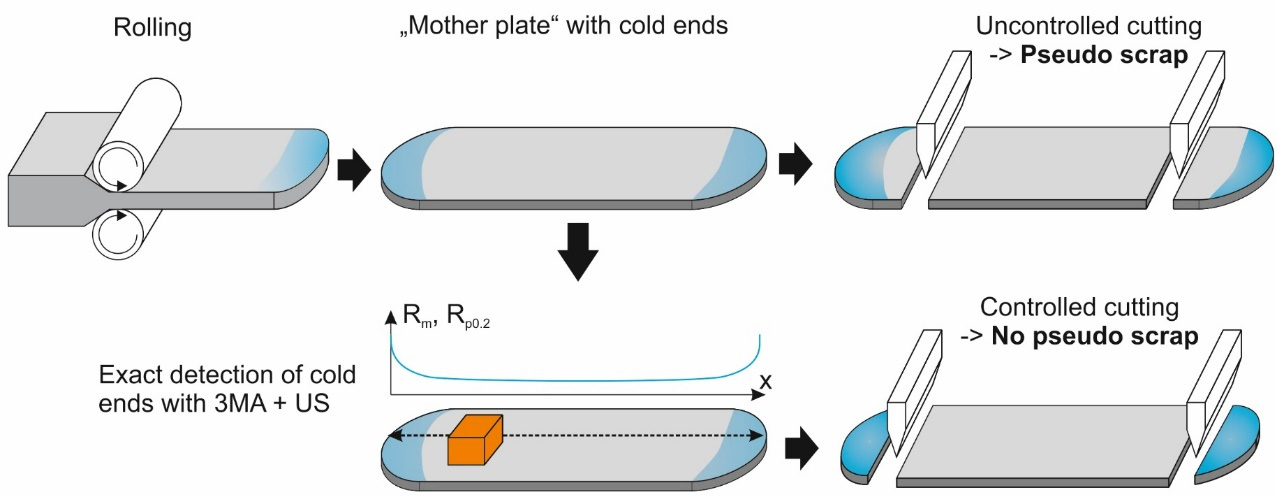
Avoiding pseudo-scrap by precise detection of the extension of cold ends.
The plates that were investigated in this project were steel grades showing a pronounced anisotropy of material properties due to a rolling texture. Therefore, it turned out to be useful to combine the measuring information from 3MA with measuring parameters that are derived from the time‐of‐flight (TOF) measurements of ultrasound (US) waves. It could be shown that, in highly texturized steel grades, adding relative differences of the US TOFs to the calibration functions could reduce the measuring error. This is shown in the following Table.
| Parameters in Calibration Functions |
RMSE of Rm [MPa] |
RMSE of Rp0.2 [MPa] |
RMSE of Hardness [HB] |
|
Only 3MA parameters |
12 |
23 |
5 |
|
3MA and US parameters |
10 |
11 |
4 |
Results of different types of calibration—without and with ultrasound (US) parameters.
The calibrated 3MA + US combination system makes it possible to determine the cold ends before cutting by precisely detecting the positions of the acceptance lines, which are separating OK and NOK quality material at the head and the root of the plate. Figure below shows the corresponding measuring procedure. In a first step, the value of the assessing measuring quantity (here: tensile strength, Rm) is measured in the reference point in the middle of the plate. Subsequently, the 3MA + US system is moved stepwise from the edge to the middle until the value of the measuring quantity falls below a preset threshold level, which is the value at the reference point plus a specified margin (here: ?Rm = 15 MPa). Afterwards, the acceptance line has been reached and it can be drawn on the plate.
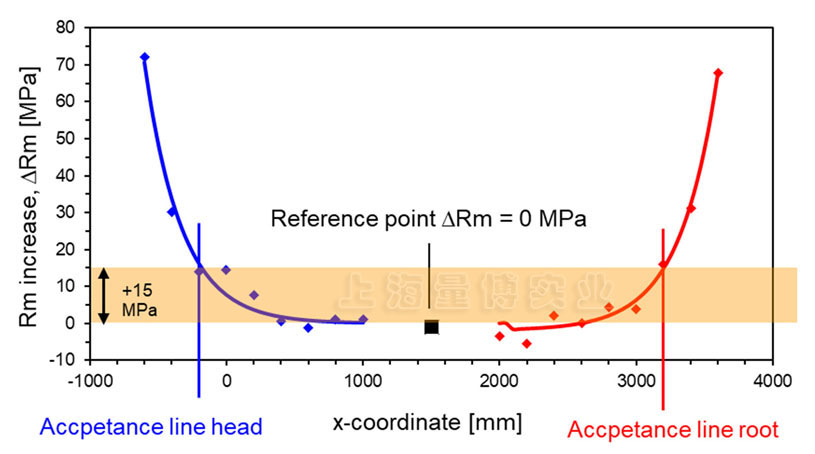
Measuring procedure for determining the cold ends at the plate head and at the plate root.
For more information, please contact LAB GAGES, or go on to visit our 3MA series NDT Systems Center.

311,Building 5,No.81,Meiyue Road,Waigaoqiao Free Trade Zone,Pudong,Shanghai,China
amy@labgages.com
021-50473900


About LAB | Cooperative Brand | Contact us | Sitemap

滬公網(wǎng)安備 31011502000213號(hào)

 滬ICP備12021537號(hào)-1
©2012-2024 LAB GAGES